Recipes ·
Dairy-Free Probiotic Yogurt Recipe, Featuring L-Biome
A healthy gut is crucial to overall health, influencing numerous physiological systems beyond just digestion to also include nutrient absorption, immune system, and mental well-being - and probiotics play a major role in promoting a balanced gut microbiome. While traditional dairy yogurt is touted as a rich source of probiotics, the Longevity Diet recommends eating a mostly vegan diet, which includes minimizing (or eliminating) dairy intake. So, we've created a DIY yogurt recipe using nut milk and our L-Biome probiotic capsules. Enjoy, and reap the benefits of a happy gut!
Ingredients:
- 1/2 gallon nut milk (such as unsweetened almond, cashew, or coconut)
- 2 L-Biome probiotic capsules
- Thermometer (optional but helpful)
- Yogurt strainer or nut milk bag (optional, if you would like to make thicker yogurt)
You will also need:
- Large soup pot
- Large towel or blanket
- Heating pad
-
Mason jars (for storage)
Instructions:
- Heat the Milk:
- Pour the nut milk into a large soup pot.
- Heat over medium-low heat until it reaches 185°F (or looks frothy and steamy with small bubbles forming, but not boiling).
- Cool the Milk:
- Turn off the heat and remove the pot from the stove.
- Allow the milk to cool down to between 100°F and 115°F. You can do this naturally or speed up the process by submerging the bottom of the pot in an ice bath.
-
The milk should be warm but not hot to the touch. A good rule of thumb is that you should be able to hold your (clean!) finger in the milk for a count of 10.
- Add L-Biome:
-
Open two L-Biome capsules and sprinkle the contents into the cooled milk. Whisk thoroughly to combine.
- Ferment the Yogurt:
- Cover the pot with a lid, then wrap it tightly in a large towel or blanket.
- Place the wrapped pot on a heating pad set to low and let it ferment for 24 hours. The goal is to maintain an even temperature of around 110°F during this period.
-
For a less tangy yogurt, you can ferment for as little as 8 hours (opting instead to put the pot in a proving drawer, in the oven with the oven light on, or placing it in a cooler with warm water) - but for a thick, tangy, and probiotic-rich yogurt, aim for closer to 24 hours.
- Thicken and Store:
- Once the fermentation period is complete, spoon the yogurt into mason jars for storage. The yogurt will thicken further as it cools in the fridge.
- If you prefer thicker yogurt, transfer it to a yogurt strainer or nut milk bag and let it drain for 8-12 hours, or until it reaches your desired consistency.
Tips and Usage:
- How long will homemade yogurt last?
- Homemade yogurt typically lasts 2-3 weeks in the fridge. It may get tangier over time, so always use your senses to check for spoilage.
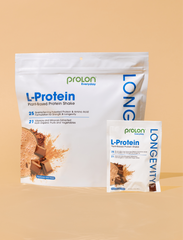
- Tip: Add a few scoops to your L-Protein for an extra creamy meal replacement or post-workout shake that supports muscle health, without accelerating aging.
RECENT ARTICLES


Recipes

PROLON PRODUCTS